What is a firewall?
A firewall is a network security device that protects your system's perimeter. It monitors outgoing and incoming network traffic and blocks or allows traffic based on pre-established security rules.
A firewall is like the curtain walls that surround and protect the interior of most medieval castles, and it is a barrier between your internal network and incoming traffic.
How does a firewall work?
Firewalls are stateful, which means they monitor outgoing data traversing the firewalls. For example, sitting behind your firewall, you instantiate a connection to Google.com; the firewall will track your connection and allow your outbound traffic out. Since you established a connection with Google servers from your system, your firewall will allow the return traffic.
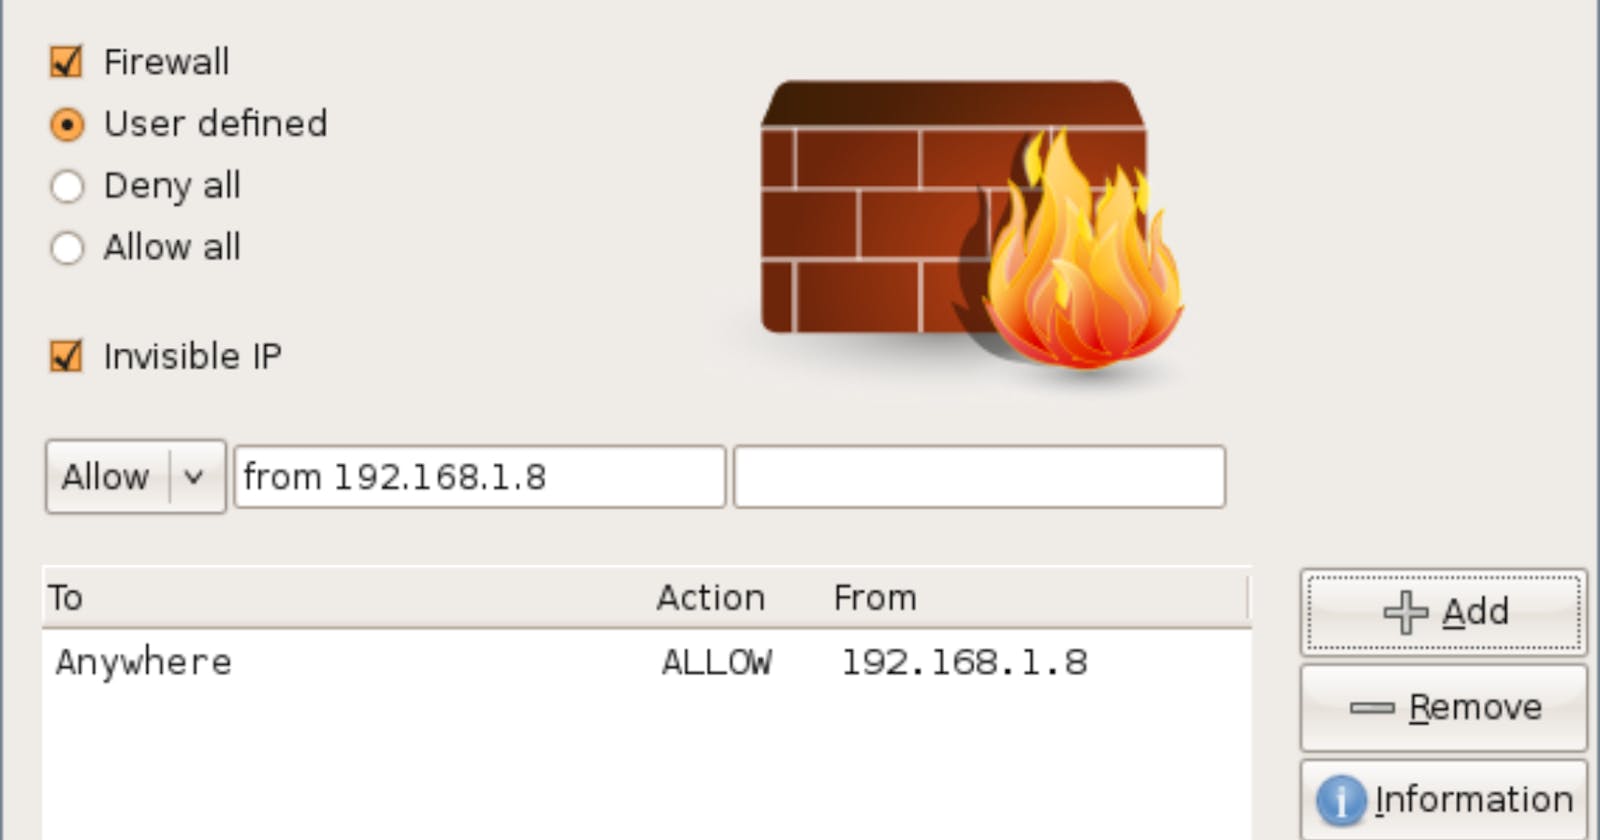
The firewall meticulously analyzes incoming traffic based on pre-defined security rules and block unknown or suspicious IP addresses. For example, you can set rules only to allow port 80 (HTTP) traffic and port 443 (HTTPS) into your system, and any other ports will be blocked. Or you can set a specific source address like 192.168.1.8 to reach your system over port 443. That could be to allow remote employees to access the company servers.
Steps to set up a firewall on Ubuntu (UFW)
Before doing anything in my virtual machine terminal, I have to download all the package lists from the repositories and update them to get the newest versions.

Now that I have all the package update, I can install a UFW firewall on my Ubuntu machine.

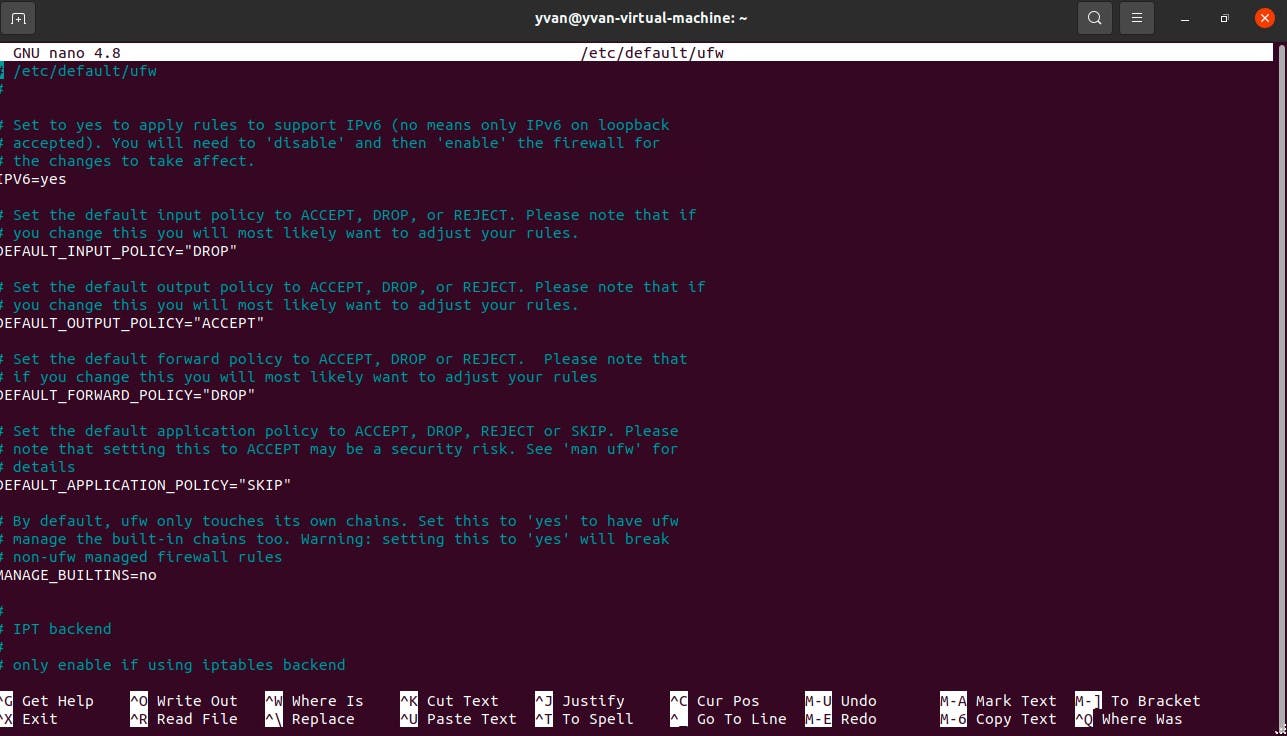
After installing the firewall system, I will set it up. I will nano into the location path and look at the configurations. By default, a firewall will allow IPV6 addresses, and you can leave it as it is.


Now, let's define our firewall policies. I will block all incoming traffic right now but allow specific ones to enter my system later. I will also allow all outgoing traffic because those are the traffic that I will generate from the inside of my system; therefore, they will be secure.

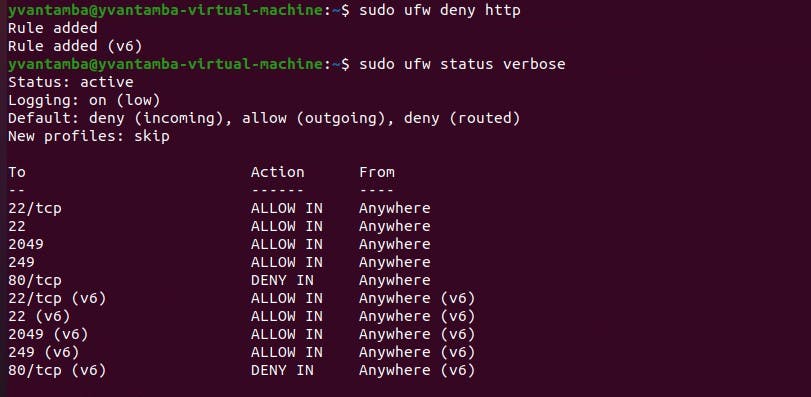
To be able to manage the firewall, I enabled SSH. If I had two network cards, I could have blocked SSH on one card and allowed it on the other one. But because I only have one network card on my server and for the lab context, I allow SSH on port 22 on the single card to manage the firewall.

I set up the firewall to be active upon startup. Please look at the firewall to see what is allowed into our system.

I have also allowed port 249, which is NFS. So clients will be able to mount a share.
In a traditional network environment, the firewall is directly in front of the hosts. They will have the default route to the firewall, which will manage the inbound and outbound traffic. I set up the firewall in front of a single host in this particular case.
I can easily create a rule. For example, I can block all HTTP traffic on port 80 via TCP.

Our firewall is now set up, and we can easily modify or create new rules to suit our security policies.
Thank you for your time, and I hope you have learned a lot about firewalls and how to set up a firewall through this lab.
Merry Christmas to you and your loved ones.
Yvan, The Architect.
